

How to Make Cotton Candy and Candy Floss at Home
flavoryplatter.com >> Uncategorized>> How to Make Cotton Candy and Candy Floss at Home
How to Make Cotton Candy and Candy Floss at Home
Cotton candy and candy floss are two names for the same sweet treat. People call it cotton candy in North America. People in the UK and Australia call it candy floss. Cooks make this colorful treat by spinning melted sugar into thin threads. It melts in your mouth almost instantly.
You do not need to wait for a fair or carnival to enjoy this treat. You can easily make fresh spun sugar right in your own kitchen. It costs very little money. Plus, making it at home is a fun activity for the whole family.
Learning how to make cotton candy and candy floss at home is easier than you think. You can make it with or without a machine. Simple kitchen tools like a wire whisk or wooden spoons work great. All you need is sugar, water, and a little patience to get started.
The History and Origins of Spun Sugar
Spun sugar first appeared in 15th-century Italy. Master chefs melted sugar by hand and pulled it into delicate golden threads. They used these thin strands to build elaborate, edible sculptures for wealthy noble banquets.
Back then, sugar was a costly luxury reserved only for the elite. Crafting spun sugar required immense labor, patience, and skilled hands. Because it took so much time to make, ordinary people rarely got to taste it.
Everything changed in 1897 when a dentist and a confectioner invented the electric sugar machine. They introduced their machine-spun treat at the 1904 World’s Fair. This breakthrough made spun sugar affordable, fast to produce, and famous worldwide.
Global Naming: North America vs. The World
People around the globe love this sweet treat, but they call it by different names. In North America, everyone knows it as cotton candy. The name simply describes its soft, fluffy, cotton-like texture.
Across the ocean, the naming changes completely. People in the UK, Ireland, and South Africa call it candy floss. Meanwhile, Australians and New Zealanders refer to this spun sugar treat as fairy floss.
The Science of Sugar Crystallization
Sugar crystallization is the process where liquid sugar cools down and turns back into solid crystals. When you heat table sugar with water, the solid granules break apart and dissolve completely. The high temperature forces the sugar to melt into a smooth, thick syrup.

The secret to spinning sugar lies in controlling how this syrup cools. If hot sugar cools down slowly on its own, it quickly binds back together into hard, coarse crystals. Heating the mixture to a specific temperature and cooling it instantly prevents these large crystals from forming.
Rapid cooling locks the melted sugar into an amorphous, glass-like state. Forcing this soft liquid through tiny machine holes stretches it into micro-thin fibers before crystals can rebuild. This clever science gives the final treat its signature light, melt-in-your-mouth feel.
Other countries use even more creative names in their own languages. For example, the French call it papa’s beard, while in Greece it translates to old woman’s hair. No matter what you call it, the delicious spun sugar remains the same everywhere.
Essential Ingredients You Need
Making spun sugar at home requires only a few basic pantry staples. White granulated sugar serves as the main foundation because it melts evenly and forms clean sugar threads. A small amount of liquid corn syrup keeps the melted sugar smooth and prevents unwanted sugar crystals from forming during heating.
You also need water to help dissolve the sugar crystals over medium heat. A few drops of food coloring give the fluffy treat its vibrant, classic carnival look. Finally, adding concentrated liquid extract brings delicious fruit or vanilla flavors to life.
| Ingredient | Exact Quantity | Primary Function / Purpose | Best Alternatives / Substitutes |
| White Granulated Sugar | 4 cups (800g) | Primary base that melts down to form spun micro-fibers | Caster sugar or superfine sugar |
| Light Corn Syrup | 1 cup (240ml) | Prevents sugar crystallization and maintains a smooth syrup | Liquid glucose or invert sugar syrup |
| Clean Water | 1 cup (240ml) | Dissolves sugar crystals evenly during initial heating | Filtered water |
| Table Salt | 1/4 teaspoon (1.5g) | Enhances flavor and cuts through intense sweetness | Fine sea salt |
| Gel Food Coloring | 4 to 6 drops | Provides bright, vibrant colors without diluting syrup | Powdered food coloring |
| Liquid Flavor Extract | 1 teaspoon (5ml) | Infuses signature tastes like bubblegum, fruit, or vanilla | Oil-based candy flavoring drops |
Tools for Hand-Spinning Sugar
You do not need an expensive commercial machine to spin sugar at home. A heavy-bottomed stainless steel pot works best for heating your sugar mixture evenly. A reliable clip-on candy thermometer is also crucial to measure exact liquid temperatures.
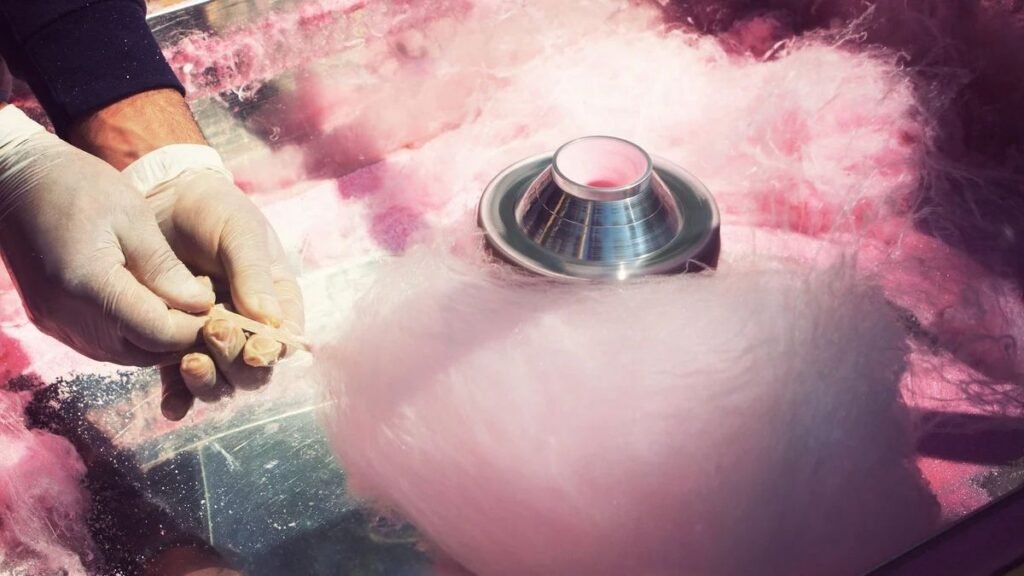
Hand-spinning requires simple household tools to catch and shape the hot threads. Cut metal wire whisks with open ends help fling thin sugar strands across your work area. Wooden skewers, parchment paper, or long chopsticks give you clean surfaces to collect the sweet spun fibers.
Step-by-Step Sugar Syrup Preparation
Combine white sugar, water, and light corn syrup in a heavy-bottomed saucepan. Stir the mixture gently over medium heat until the sugar dissolves completely. Wipe down any stray sugar crystals from the inner sides of the pan using a wet pastry brush.
Attach a candy thermometer to the side of your pot and stop stirring entirely. Let the sweet liquid come to a steady rolling boil. Watch the temperature closely as the boiling syrup thickens and darkens slightly.
Remove the saucepan from the stove the exact moment the thermometer reaches 300°F. Place the bottom of the hot pot into a shallow dish of warm water to stop the cooking process immediately. Stir in your favorite food coloring and flavor extract before you start spinning.
Finally, keep basic safety items right next to your cooking station. Heavy silicone oven mitts protect your hands from accidental splatter while flicking hot syrup. A large bowl filled with cold ice water provides instant relief if any hot liquid splashes onto your skin.
How to Spin Sugar Without a Machine
Cover your kitchen counters and floor with clean parchment paper or aluminum foil. Lay two long wooden spoons or dowels flat across your workspace with their handles extending out. Dip a cut wire whisk directly into your hot sugar syrup and lift it to catch the excess liquid.
Flick your wrist rapidly back and forth over the extended spoon handles. The hot liquid syrup will throw long, paper-thin sugar threads into the air as you sweep your hand. These delicate golden strands cool down almost instantly as they fall over the handles.
Carefully gather the soft, airborne sugar threads off the wood using your fingers. Gently wrap the fluffy pile into a loose ball or shape it around a paper cone. Serve your hand-spun sugar treat right away before atmospheric moisture makes it sticky.
Safety Precautions for Hot Molten Sugar
Working with liquid sugar requires extreme care because molten syrup reaches over 300°F. Hot sugar acts like liquid glass and sticks instantly to human skin, causing severe thermal burns. Always wear thick heat-resistant gloves and long sleeves to protect your arms from accidental splatters.
Prepare a large bowl filled with ice water before you even turn on the stove. If hot liquid splashes on your skin, plunge the affected area into the ice bath immediately to stop the burning process. Never try to wipe off hot syrup with your hands, as this will spread the burn further.
Keep children and pets completely out of the kitchen while working with hot sugar. Use a deep, sturdy pot so the boiling liquid cannot splash over the sides. Always stay focused on your work area and avoid moving heavy pots of boiling syrup around the room.
Troubleshooting Common Sugar Mistakes
Spinning sugar can go wrong quickly if your kitchen is too humid or your pot gets too hot. High moisture in the air causes delicate sugar strands to absorb water, melt, and turn into a sticky mess. Working in a cool, air-conditioned room helps keep your sweet creations light and fluffy.
Burnt or cloudy syrup is another common issue when making spun sugar. If your sugar turns dark brown or tastes bitter, your heat was too high or your cooking time was too long. Always use a reliable candy thermometer and remove the pot from the stove as soon as it reaches 300°F.
If your liquid syrup crystallizes into a grainy clump inside the pan, stray sugar crystals on the pot walls are usually to blame. Avoid stirring the boiling mixture after the sugar dissolves. Wiping the inner sides of the pan with a wet pastry brush keeps the syrup smooth and ready for spinning.
Flavor and Color Customization Techniques
Customizing your spun sugar allows you to create unique treats for any event. You can easily add different colors and concentrated flavor extracts to match a party theme. Experimenting with fun combinations makes the traditional carnival sweet feel fresh and exciting.
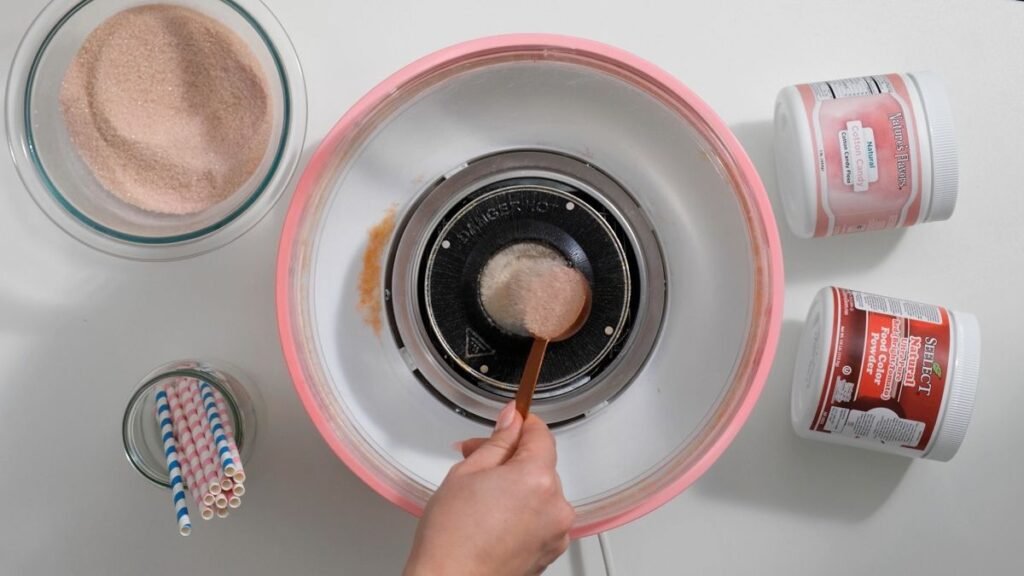
Always add your coloring and flavoring after taking the sugar syrup off the heat. Stirring in liquid extracts while the pot is on the stove causes the flavors to evaporate. Gel-based food colors work much better than liquid drops because they deliver bold color without diluting the syrup.
You can mix colors to make beautiful layered designs or match favorite fruit flavors to matching shades. For instance, pairing blue color with raspberry flavor creates a popular classic combination. Adding subtle pastel tints gives hand-spun sugar an elegant look suitable for fancy desserts.
Creative Serving and Presentation Ideas
You can elevate basic spun sugar by serving it in fun, eye-catching ways. Instead of using plain paper cones, wrap fluffy sugar clouds around decorative paper straws or colorful glow sticks. Placing small puffs of hand-spun sugar on top of ice cream scoops, cupcakes, or dessert plates adds an instant gourmet touch.
Spun sugar also makes a stunning topping for party drinks and mocktails. Balance a small cloud of colorful sugar right over the rim of a cold glass. When guests pour clear soda or sparkling water over the top, the sugar melts instantly and transforms the drink’s color and taste.
For outdoor events or favor bags, shape the sugar into compact balls and seal them in clear Mason jars. Tiered cake stands or decorative dessert trays work great for displaying different colored spun sugar puffs together. Creative styling turns a simple homemade treat into a memorable party centerpiece.
Airtight Storage Methods to Prevent Melting
Humidity is the biggest enemy of freshly spun sugar. Sugar naturally draws moisture out of the air, causing the delicate fibers to shrink, dissolve, and melt into a hard, sticky clump. Keeping your spun sugar completely sealed off from room air is the best way to preserve its fluffy texture.
Store your finished sugar creations in clean, 100% airtight plastic containers or glass Mason jars immediately after making them. You can also place food-safe desiccant packets inside the containers to absorb any trapped air moisture. Make sure to press out excess air if you use zip-top plastic bags to seal your treats.
Keep your sealed containers in a cool, dark, and dry room away from direct sunlight or heat sources. Never store spun sugar in the refrigerator or freezer, as the high humidity inside will ruin it instantly. Proper airtight storage keeps your homemade spun sugar light and crisp for up to several days.
Conclusion
Making spun sugar at home is a fun and rewarding process. You do not need expensive equipment or complex ingredients to create impressive sweets. With basic kitchen tools, a little patience, and simple safety steps, anyone can master this classic treat.
Experiment with different colors, wild flavors, and creative presentation styles to surprise your family and friends. Practice helps you get the hand movements and syrup temperatures just right. Grab your whisk, melt some sugar, and enjoy crafting your own fluffy creations!
Frequently Asked Questions
1. Can I make cotton candy without a machine?
Yes, you can hand-spin sugar by melting syrup to 300°F and flicking it over wooden handles using a cut wire whisk.
2. Why does my spun sugar melt or become sticky so quickly?
Sugar absorbs moisture from the air, so humidity instantly dissolves the delicate fibers into a hard clump.
3. What temperature should the sugar syrup reach before spinning?
The syrup must reach the “hard crack” stage at exactly 300°F (149°C) on a candy thermometer before you remove it from heat.
4. How long can I store homemade spun sugar?
If sealed immediately in a completely airtight container with a desiccant pack, it will stay fluffy for 2 to 3 days.
5. Can I store spun sugar in the refrigerator?
No, the high humidity inside a refrigerator will ruin the spun sugar and cause it to melt instantly.
Related Post
Best Italian Desserts for Holidays, Parties, and Special Occasions
Italian desserts are traditional sweet dishes from Italy. They often use cream, chocolate, coffee, fruit,…
One thought on “How to Make Cotton Candy and Candy Floss at Home”